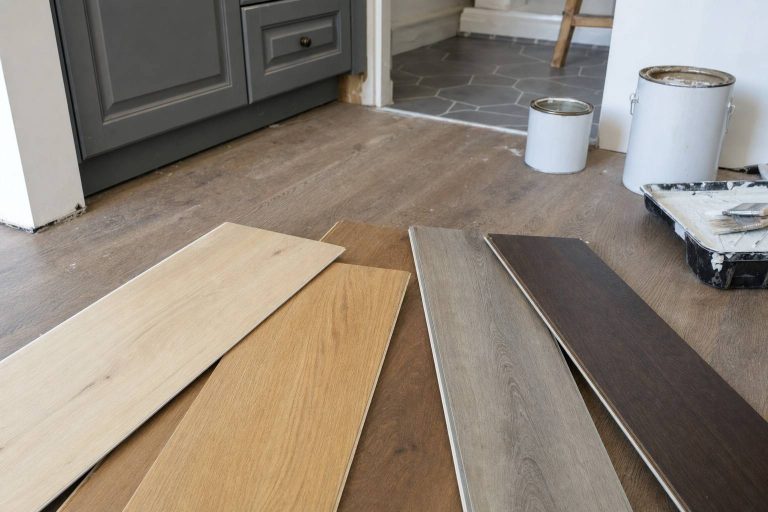
How to Seal Granite, Marble & Quartz Countertops Properly
Granite and marble:
- Sealing every 1-3 years since they’re porous and absorb stains easily.
- Use a penetrating sealer, not a topical one.
- Clean your counters thoroughly, apply the sealer in sections, then wipe away excess after the recommended dwell time. Wait 24-72 hours before heavy use.
Quartz: shouldn’t be sealed, it’s non-porous and sealing can actually cloud the surface.
Understanding your specific stone type makes all the difference in protecting your investment.
Best All-Around Penetrating Sealer for Granite and Marble Countertops
Reader-supported: if you buy through links on this page we may earn a small commission, at no extra cost to you.
Short answer: Quartz never needs sealing. Granite, marble, and quartzite do, on different schedules. Marble is the neediest, granite is about yearly, and quartzite stretches the longest.
Which Countertops Need Sealing, and How Often
| Countertop | Needs sealing? | How often |
|---|---|---|
| Quartz (engineered) | No, never | Non-porous, do not seal |
| Granite | Yes | About every 12 months (dense, dark stone 18 to 24) |
| Marble | Yes | Every 6 to 12 months |
| Quartzite | Yes | Every 12 to 18 months |
1. Do Granite, Marble, Quartzite, and Quartz All Need Sealing?
Not all countertop stones demand sealing. It depends on how porous your material actually is.
- Granite and marble absorb liquids readily, so they’re candidates for regular sealing.
- Quartz doesn’t need it since it’s engineered to resist stains.
You can test whether your stone needs protection by pouring a small amount of water on the surface and watching whether it beads up or soaks in.
How Porous Is Your Stone, Really?
Why do two granite countertops with the same name need different care? Porosity varies wildly by quarry, density, and finish:
- Dark, dense granites barely absorb water.
- Light marbles absorb almost instantly.
Polished surfaces close surface pores tightly, reducing absorption. Honed or leathered finishes stay more porous. Your stone type determines absorption rates and staining risks. A honed marble island needs more frequent sealing than polished edges.
Some dense quartzites barely need sealer at all.
Location matters too: your prep zone near the sink faces constant oils and acids, demanding stronger protection than your backsplash ever will.
Quick Tests to Know If Sealing Is Necessary
Before you commit to resealing your entire countertop, you can run two simple tests right now to see if your stone actually needs protection.
Try the water drop test:
- Place a few drops on a clean, dry section and time how quickly the stone darkens.
- If water beads up and leaves no spot after several minutes, your sealer’s still working.
- Darkening within a minute signals sealing urgency.
Test multiple locations: near the sink, cooktop, and bar areas wear faster. Run the oil test similarly.
Note: engineered quartz won’t darken; darkening indicates a manufacturing issue, not a sealing need.
2. Choosing the Right Sealer for Your Countertop
When you’re choosing a sealer, you’ll find two main types: penetrating sealers that sink deep into the stone and topical sealers that just sit on the surface.
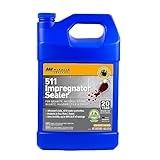
Penetrating sealers are what your kitchen countertops actually need because they protect against stains and damage from within, while topical coatings won’t give you that thorough protection. A dependable pick is a penetrating stone sealer from Granite Gold that soaks in rather than sitting on the surface.
Different stones like granite, marble, quartzite, and engineered quartz have different needs, so you’ll want to match your sealer to your specific countertop material for the best results.
Penetrating vs Topical Sealers (and Why Kitchens Need One, Not the Other)
The two main sealer types work in fundamentally different ways, and your kitchen demands the right choice.
- Penetrating sealers benefits include soaking into stone porosity, repelling liquids while keeping surfaces naturally grippy and breathable, ideal for food prep.
- Topical sealers, conversely, sit on top like clear coat, changing gloss and scratching easily under daily use.
Kitchen safety considerations rule out topicals; they peel, yellow, and trap moisture.
Ignore sealing product myths claiming “all-surface” formulas work everywhere; most are mild topicals unsuitable for polished granite or dense quartzite.
For your counters, penetrating sealers deliver the protection you need without compromising function or feel.
Matching the Sealer to Granite, Marble, Quartzite, and Engineered Quartz
For a penetrating sealer, you’ll need to match it to your specific stone type:
- For granite, choose sealers designed for deep protection and extended sealer longevity.
- Marble demands products specifically formulated to resist acidic etching.
- Quartzite‘s porous nature requires high-quality sealers for strong moisture defense.
Engineered quartz rarely needs sealing due to its non-porous composition.
Check reviews and manufacturer recommendations tailored to your stone.
This targeted approach guarantees ideal surface protection, simplifies stone maintenance, and ensures application techniques work effectively for your countertops.
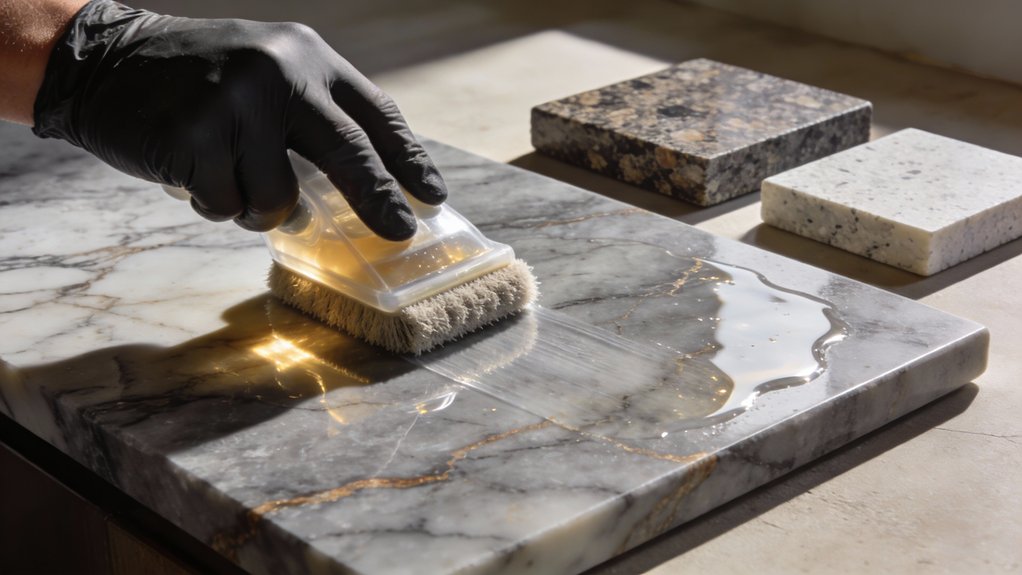
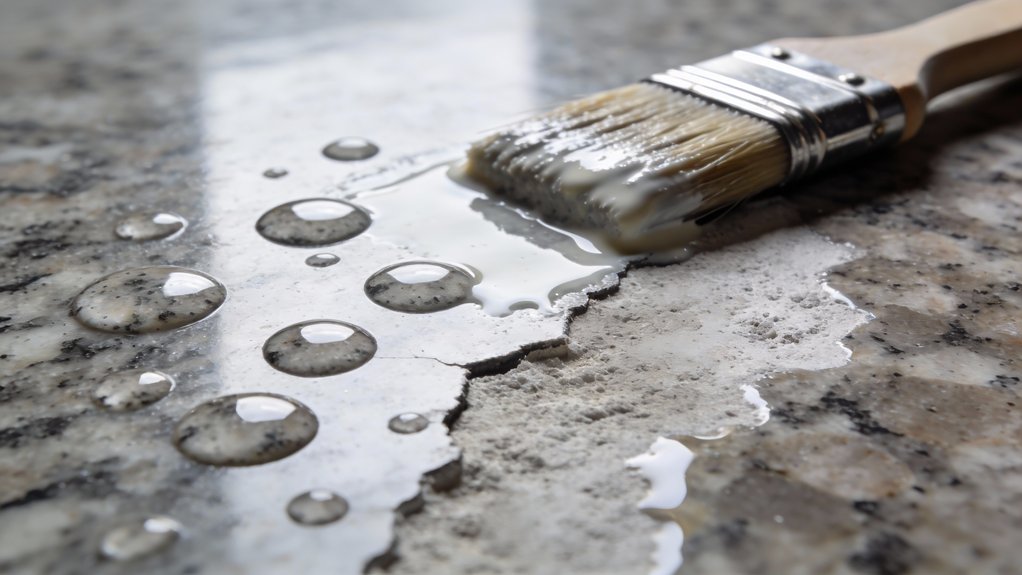
3. Step-by-Step: How to Seal Granite and Marble Properly
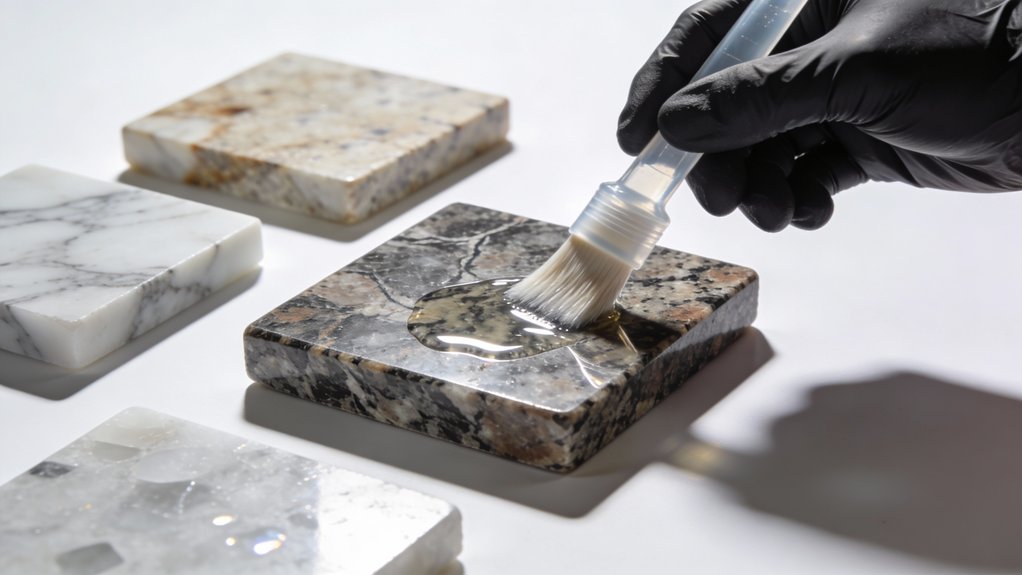
- Start by cleaning your countertop thoroughly with a suitable daily cleaner and letting it dry completely. This removes dust and debris that can interfere with sealer absorption.
- Next, you’ll apply the sealer in even coats with specific wait times between applications and a careful wipe-down afterward.
- Finally, you’ll need to understand curing times so you don’t use your counter too soon and compromise the seal’s effectiveness.
Preparation: Cleaning, Drying, and Taping Off Trouble Spots
Three critical steps separate a professional-looking seal from a sticky, uneven mess: cleaning, drying, and protecting adjacent surfaces.
- Use a pH-neutral stone cleaner to remove soap film, grease, and paint flecks. A razor blade works great for stubborn residue.
- Dry completely; ideally wait 24 hours for best results.
- Tape off caulk lines, walls, wood trim, sink edges, and appliances to prevent sealer drips.
Don’t skip ventilation and gloves either; solvent-based sealers off-gas, and your safety matters.
Taking these preparation steps seriously transforms your sealing outcome from amateur to pro-quality work.
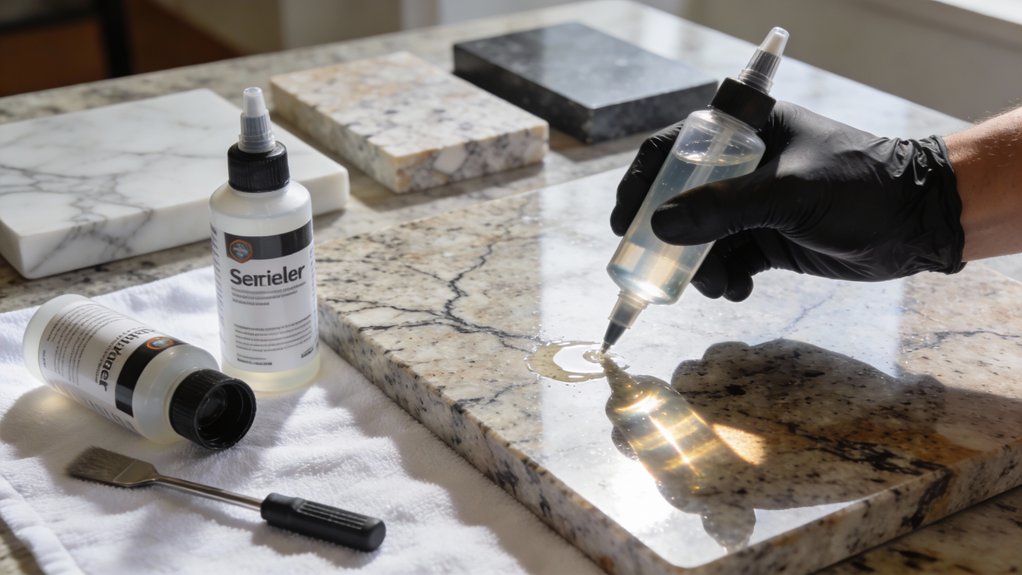
Applying the Sealer: Dwell Time, Wipe-Off, and Second Coats
With your counters prepped and protected, it’s time to get the sealer onto the stone.
- Work in manageable sections using a lint-free cloth or microfiber pad.
- Apply an even coat and keep the surface uniformly wet during the manufacturer’s recommended dwell time, usually 3 to 5 minutes.
- If sealer starts drying or getting tacky, add more product to re-wet the area.
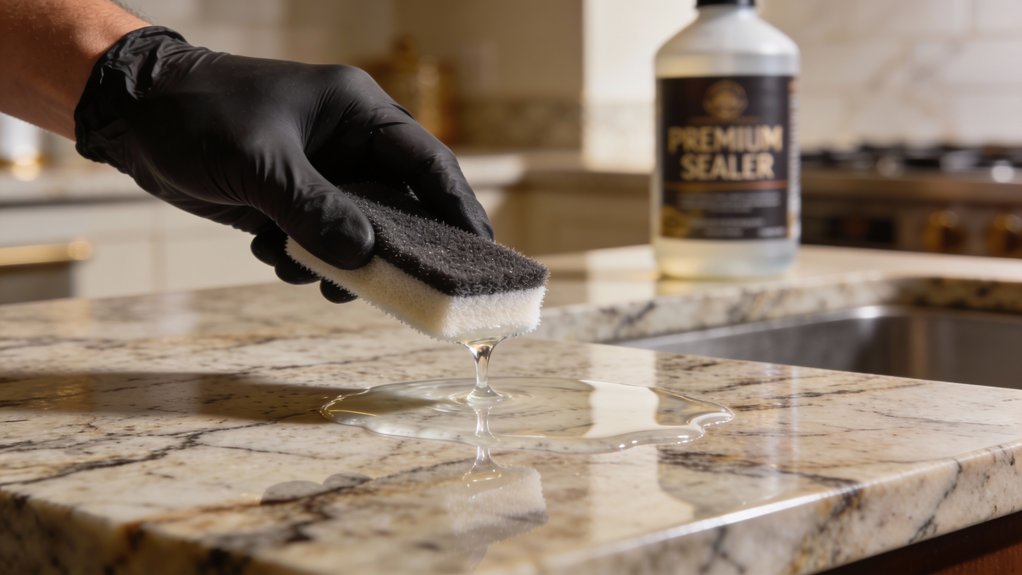
After the dwell time passes, wipe off excess thoroughly with a dry cloth. Any shiny or streaky residue means sealer’s sitting on top instead of penetrating.
Wait 30 minutes, then apply your second coat application using identical techniques for complete sealing frequency.
Curing Time and When You Can Use the Counter Again
Counters are not ready when they feel dry to the touch:
- Light use becomes possible after a few hours, but full sealant effectiveness requires 24 to 72 hours of curing duration.
- During this window, avoid placing appliances, cutting boards, or heavy decor on the surface; these items can trap moisture and imprint marks into freshly sealed stone.
- If spills occur, use only gentle cleaning with a soft cloth.
- Skip degreasers and abrasive pads entirely until cure time completes.
Humid or cool environments extend curing further, so patience now guarantees your countertop’s lasting protection and durability.
4. Quartz Countertops: When Sealing Is Unnecessary or Risky

Unlike granite and marble, quartz countertops don’t need sealing because manufacturers bond them with resins that block liquid penetration entirely.
If you do seal quartz anyway, you’re risking damage. The wrong sealer can cloud the surface or strip away its finish.
Stick with mild soap and water instead, which is all your quartz actually needs to stay beautiful and protected.
Why Engineered Quartz Is Different from Natural Stone
Engineered quartz doesn’t behave like granite or marble because it’s fundamentally different in how it’s made.
- It is a resin-bound composite that’s roughly 90% quartz plus resins and pigments.
- This manufacturing process creates a non-porous surface where liquids don’t soak in like they do with natural stone.
- Your stain resistance comes directly from that factory resin matrix, not from a sealer you apply later.
Most leading quartz brands explicitly state no sealer is required, a major engineered quartz benefit. This maintenance advantage means more predictable performance and less upkeep for you over time.
What Can Go Wrong If You Seal Quartz Anyway
Since quartz already has built-in protection from its factory resin, applying a sealer is usually a waste of time and money, and it can actually cause problems.
- The sealer may not bond properly with the resin surface, creating a cloudy or hazy appearance.
- You’ll face sealer compatibility issues that lead to quartz surface damage over time.
- Chemical reactions risk occurs when sealers interact with the engineered resin, potentially causing discoloration.
- Excess sealer creates sticky residue that attracts dirt.
Instead, stick with mild soap and water for daily maintenance.
5. Common Sealing Mistakes That Damage Countertops
You can accidentally damage your countertops by over-sealing, applying sealer over existing stains or residue, or using the wrong cleaner afterward.
Each of these mistakes traps problems beneath the surface or strips away the protective layer you just applied.
Understanding what goes wrong helps you avoid costly repairs and keep your investment looking fresh.
Over-Sealing and Sticky, Blotchy Residue
One of the biggest mistakes homeowners make is applying too much sealer too often or leaving excess product sitting on the surface.
- When you don’t wipe off excess thoroughly, residue buildup develops.
- You’ll notice sticky patches, cloudy film, and streaks that catch every fingerprint and crumb.
Over sealing actually traps contaminants, oils and dust, in the upper pores, making your stone look worse and changing how light reflection works across the countertop.
The fix involves using a mild solvent or manufacturer-recommended sealer remover with gentle agitation.
Severe cases need professional stripping and re-sealing for best results.
Sealing Over Stains, Oils, or Soap Film
Most sealing problems happen when you seal right over existing contaminants. Grease near cooktops and dish soap near sinks lock discoloration permanently in place.
You’ll need proper stain prevention techniques before sealing begins:
- Start with pH-neutral stone cleaner for oil removal methods that actually work.
- For stubborn oils, use acetone as a solvent.
- Rinse thoroughly and allow complete drying time.
If stains already exist, draw them out with a poultice first. Confirm success before sealing, not after. This soap film solution and maintenance best practices prevent sealed-in damage.
Follow proper sealing frequency tips: apply penetrating sealer in two coats, waiting between applications. Wait thirty minutes before wiping excess away completely.
Using the Wrong Cleaner After Sealing
Getting the sealer on right is only half the battle, what happens next matters just as much.
- Avoid harsh degreasers, vinegar, bleach, and abrasive powders, as they strip your sealer unevenly and leave patchy spots.
- All-purpose sprays with waxes, silicones, or polishes create smeary buildup that buries your sealer, making you think it failed when it hasn’t.
Instead, choose stone-safe, pH-neutral cleaners explicitly labeled for sealed natural stone. A safe everyday option is a stone-safe pH-neutral cleaner.
This cleaner compatibility directly impacts sealer maintenance.
Following proper product recommendations and cleaning techniques keeps your countertops protected and looking sharp for years.
Smart choices now prevent costly damage later.
6. How Often Should You Reseal and How to Make Sealer Last Longer
You’ll find that most busy kitchens need resealing every 1 to 3 years, though your actual schedule depends on how much traffic and spills your counters handle.
The real secret to extending your sealer’s life isn’t complicated: you’re basically doing two things: wiping up spills immediately and cleaning regularly with pH-balanced products that won’t break down the protective layer.
Once you establish this simple routine, you’ll spend far less time and money on maintenance overall.
Real-World Resealing Schedules for Busy Kitchens
Granite, marble, and quartz countertops don’t follow a rigid resealing calendar; they follow your kitchen’s actual wear patterns.
- Your island where you bake and roll dough? It’ll need spot resealing yearly.
- Counter you rarely use? It might stretch five years between applications.
- Heavy family usage demands more maintenance tips than lighter kitchens.
Test your surfaces regularly with water and oil drops to gauge resealing frequency based on surface wear, not guesswork. Watch how liquids bead up. When they spread instead, you’ve got your answer.
Daily and Weekly Care That Protects the Sealer Layer
While resealing matters, what happens between applications actually determines how long your sealer lasts.
Your daily habits make the real difference:
- Wipe spills immediately, don’t let liquids sit.
- Use cutting boards and trivets religiously.
- Clean with pH-neutral stone cleaner or mild soap, never harsh chemicals that strip protection.
Small choices compound:
- Don’t slide grit-covered pots across the surface.
- Skip hot pans directly on stone.
- Use coasters for wine and citrus drinks.
- Keep counters decluttered. Fewer items mean less grime buildup and easier resealing later.
These cleaning tools and surface maintenance practices extend sealer life considerably, preventing scratches and damage between applications.
The Bottom Line
You’ve now got the knowledge to protect your countertops properly. Here’s what matters: studies show that sealed granite countertops last 15-20 years longer than unsealed ones. That’s a significant lifespan difference.
By sealing every 1-3 years and wiping spills promptly, you’re investing in your home’s durability. Don’t skip this maintenance, it’s straightforward work that pays off in years of beautiful, protected surfaces.